

The Model-View-Controller Design Pattern in AdonisJS | Full-Stack Google Contacts Clone with AdonisJS (Node.js) and Quasar Framework (Vue.js)


Finally, we will start during real development of the API side of our of Google Contacts Clone app. In this lesson, we will learn about the Model-View-Controller design pattern as implemented by AdonisJS. We will then create the model, controller, and migration files for the Contact entity.
Let's start by creating a new branch for our repo:
# Make sure you are within your project
git checkout -b 11-create-contact-model-and-controller
The Model-View-Controller Design Pattern in the AdonisJS Framework
AdonisJS follows the Model-View-Controller (MVC) design pattern. In this pattern:
- There is a
modelwhich holds the state of our data objects fetched from the database; - The
viewwhich renders and displays to the client(frontend) a formatted (HTML) version of our data; and - The controller which holds the logic for accepting requests from the clients, fetching data from the database, and sending the rendered data (HTML) back to the client. The
controlleralso includes the routing mechanism for the application.
In the context of our API server, we will not do much rendering of views because AdonisJS will return responses in JSON format and not HTML format. So the view aspect of the MVC pattern will be dormant. AdonisJS has a complete module for handing rendering of views via the Edge templating engine and it is always available for use any time.
Since, we are following the MVC design pattern, for every entity (such as a contact), we need to have a model file, controller file, and view file. Again, we are using AdonisJS in the API mode, so we won't be creating view files. Additionally, we need a migration file for creating the structure of the database table for each entity.
Let's take more about each of these files.
The Model File
In AdonisJS, models are regular JavaScript objects which hold the state/properties of entities within our application. A model is an instance of the the AdonisJS BaseModel class. For example: if a request is made for a specific contact on our database, after we fetch the record for the contact from the database, Lucid will map the record from the database into properties of the Contact model. This way, we are able to access those properties throughout the lifecycle of the API request. If the API request involved modifying the properties, we can easily assign new values to the properties and save the Contact model. The save operation will persist the new values of the properties in the database. We could also return that Contact model as a response to the client making the API request. AdonisJS will handle to conversion of the model to JSON before sending the data. This conversion process is known as serialization.
For AdonisJS to be able to map the record fetched from the database to the properties of the Contact model (for example), we need to specify those properties within the Contact class itself (we will create this Contact class very soon). The Contact class will extend the BaseModel class from the Lucid ORM package. Since it is extending the BaseModel class, we have all the Lucid operations at our fingertips for each model instance.
The Controller File
In AdonisJS, you can create dedicated Controller files (each one contains a single class). The controller class contains async methods which are mapped as route handlers for different routes. Instead of carrying out logic within route definitions, we call the methods within controller classes so that there is separation of concern and a less-congested routes file. Within these controller methods, we can create new records in our database, fetch data from the database, edit records, save files to the filesystem or upload them to external file storage services, delete records, etc.
The Migration File
Migration files are used for creating tables and column definitions in the database. As you develop the application, you might need to add or drop columns within various tables. Migration files can be used to achieve that. Migration files can also be used to reverse changes made to tables within the database. This is possible because AdonisJS logs the migration history and know which migration file was run during any batch. With this you can easily rollback changes.
Running our First Database Migration
Before we continue, let's migrate our database for the first time. When we setup the Auth package earlier, the package created a migration file for us. Check the folder api/database/migrations and you will see a file ending with users.ts. Below is the content of the file. Read more about AdonisJS database migration here.
import BaseSchema from '@ioc:Adonis/Lucid/Schema'

export default class UsersSchema extends BaseSchema {
  protected tableName = 'users'

  public async up () {
    this.schema.createTable(this.tableName, (table) => {
      table.increments('id').primary()
      table.string('email', 255).notNullable()
      table.string('password', 180).notNullable()
      table.string('remember_me_token').nullable()

      /**
       * Uses timestampz for PostgreSQL and DATETIME2 for MSSQL
       */
      table.timestamp('created_at', { useTz: true }).notNullable()
      table.timestamp('updated_at', { useTz: true }).notNullable()
    })
  }

  public async down () {
    this.schema.dropTable(this.tableName)
  }
}
The migration file defines users as the tableName. The up method is run when we are migration while the down method is run if we want to rollback changes made by the migration file. In this case, the rollback with drop the entire table since it was created during this migration.
Within the up method, we create the table with the function call this.schema.createTable(). The function takes the name of the table to be created as the first argument and passes in an instance of the table into the callback function. We then use that table instance to create the columns. Six columns will be created: id, email, password, remember_me_token, created_at, and updated_at. The table instance has various methods for creating different types of columns.
To run the migration, do:
# Ensure that your current working directory is the `api` folder, then run
node ace migration:run
The migration should be successful.
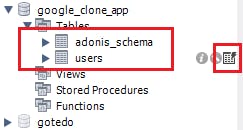
Now open MySQL Workbench. Within the Navigator panel on the left side, switch to the Schemas tab. Expand the google_contacts_clone_app schema and expand the Tables node. You will see the contacts table within. You will also see the adonis_schema table. When you hover over the name of the tables, there will be a toolbar to the right of the table names. Click the last icon to browse the tables.
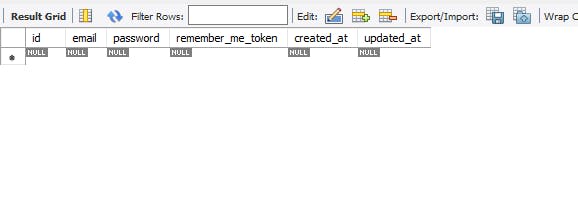
The users table:
The adonis_schema table:
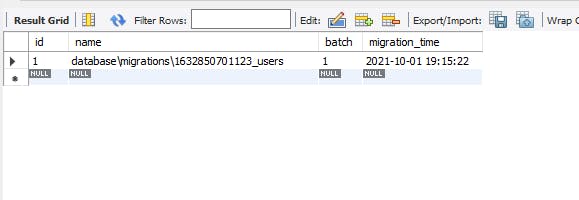
At the stage, the adonis_schema table has a single row which contains the name of the single file which was migrated and used to created the users table. It also assigned a batch number of 1 to the file.
Multiple files can be migrated in one batch and will be assigned the same batch number so that when that batch is rollback, all the changes made during that batch will be reversed.
Creating our Model, Controller, and Migration Files for our Contacts
Having learnt about the MVC pattern and carried out a migration, let's create model, controller and migration files for our Contacts. AdonisJS has a single command which can scaffold all three files for us. Do:
# Make sure your current working directory is the `api` directory
# Run:
node ace make:model Contact -mc
# Result:
CREATE: database\migrations\1633078123032_contacts.ts
CREATE: app\Controllers\Http\ContactsController.ts
CREATE: app\Models\Contact.ts
Three new files are created as seen the result above.
More on the command: node ace make:model Contact -mc
node: This is used to call theNode.jsruntime for running the scriptace:ace(path:api/ace) isAdonisJSsingle entry file for running commands. PressCTRL+Pand search forace, you will see the file.make:model:make:modelis a command registered within AdonisJS by theLucidpackage. It is used for created new models.Contact:Contactis an example of the single argument to themake:modelcommand. Here we specify the name of the model we want to create.-mc:-mcspecifies two flags for themake:modelcommand.mstands formigration, whilecstands forcontroller. Here, we are telling themake:modelcommand to createmigrationandcontrollerfiles for theContactmodel as well.
This will be all for this lesson. In this next lesson, we will add column definitions to Contact model and migration files and run our migration again to create the contacts table.
Save all your files, commit and merge with the master branch.
git add .
git commit -m "feat(api): create model, controller, and migration files for the contact model"
git push --set-upstream origin 11-create-contact-model-and-controller
git checkout master
git merge master 11-create-contact-model-and-controller
git push